FEATURES & ENHANCEMENTS
![]()
![]()
![]()
Introducing the “Pulse Planner”
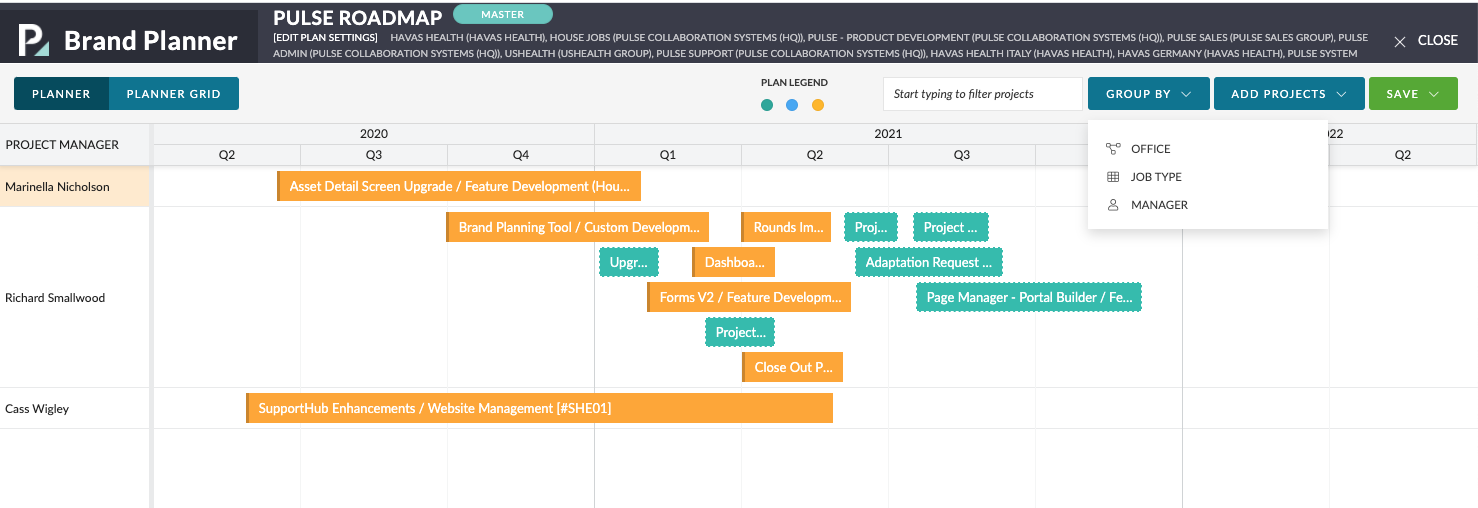
Introducing our new “Pulse Planner” feature: an interactive tool that allows you to visualise and adjust the timings of multiple ‘real’ and ‘planned’ Projects on a Schedule timeline or “Plan”.
It includes many powerful features to view and filter your Projects by Office, Job Type and Manager, and to allow collaboration with stakeholders.
The ability to add both ‘real‘ Projects and ‘planned‘ Projects to a Plan’s schedule allows you to visualise, strategize and share proposed Projects and real Projects with your stakeholders. This makes it the ideal tool for developing Brand Plans, Product Plans and Scope of Work Schedules.
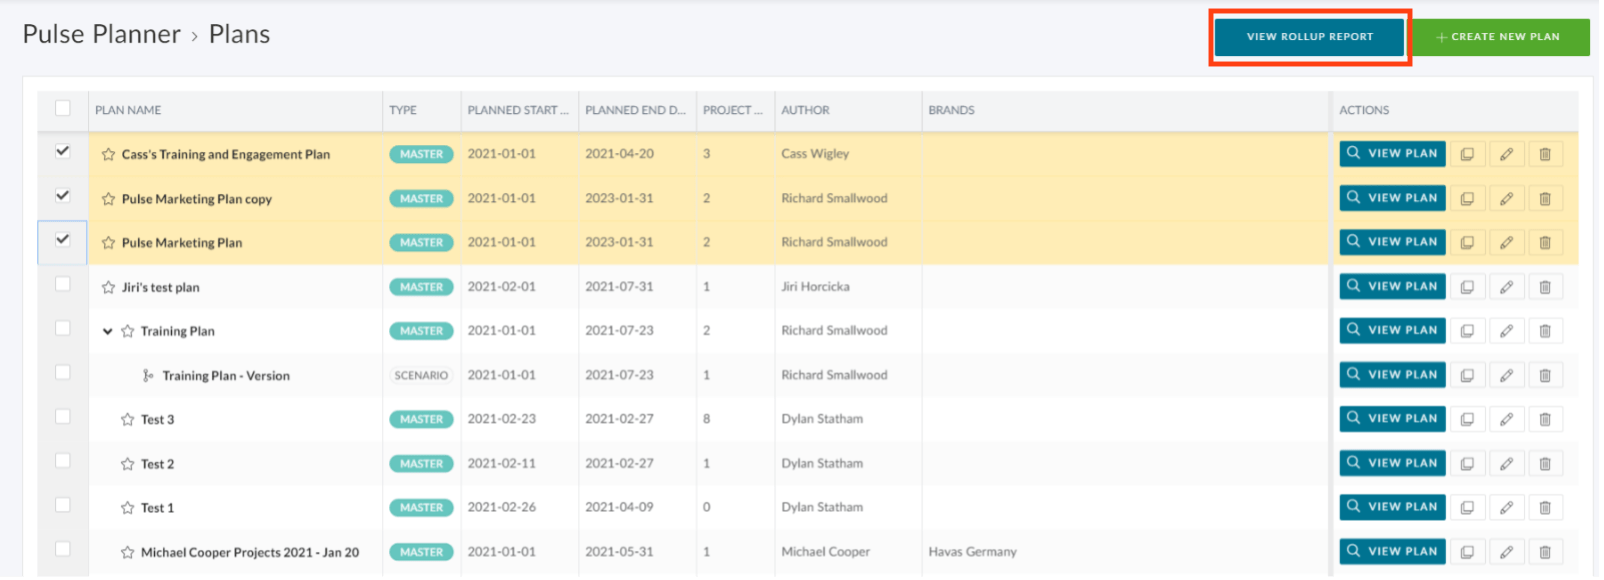
Once you have created several different plans, you can even select multiple plans and “roll them up” into an all-encompassing summary or “plan-of-plans”. We call this the “Roll up report”, where you can gain oversight over your planned and actual projects.
To find out more about this exciting new feature please visit the Pulse Training Academy Pulse Planner module.
New Support landing page
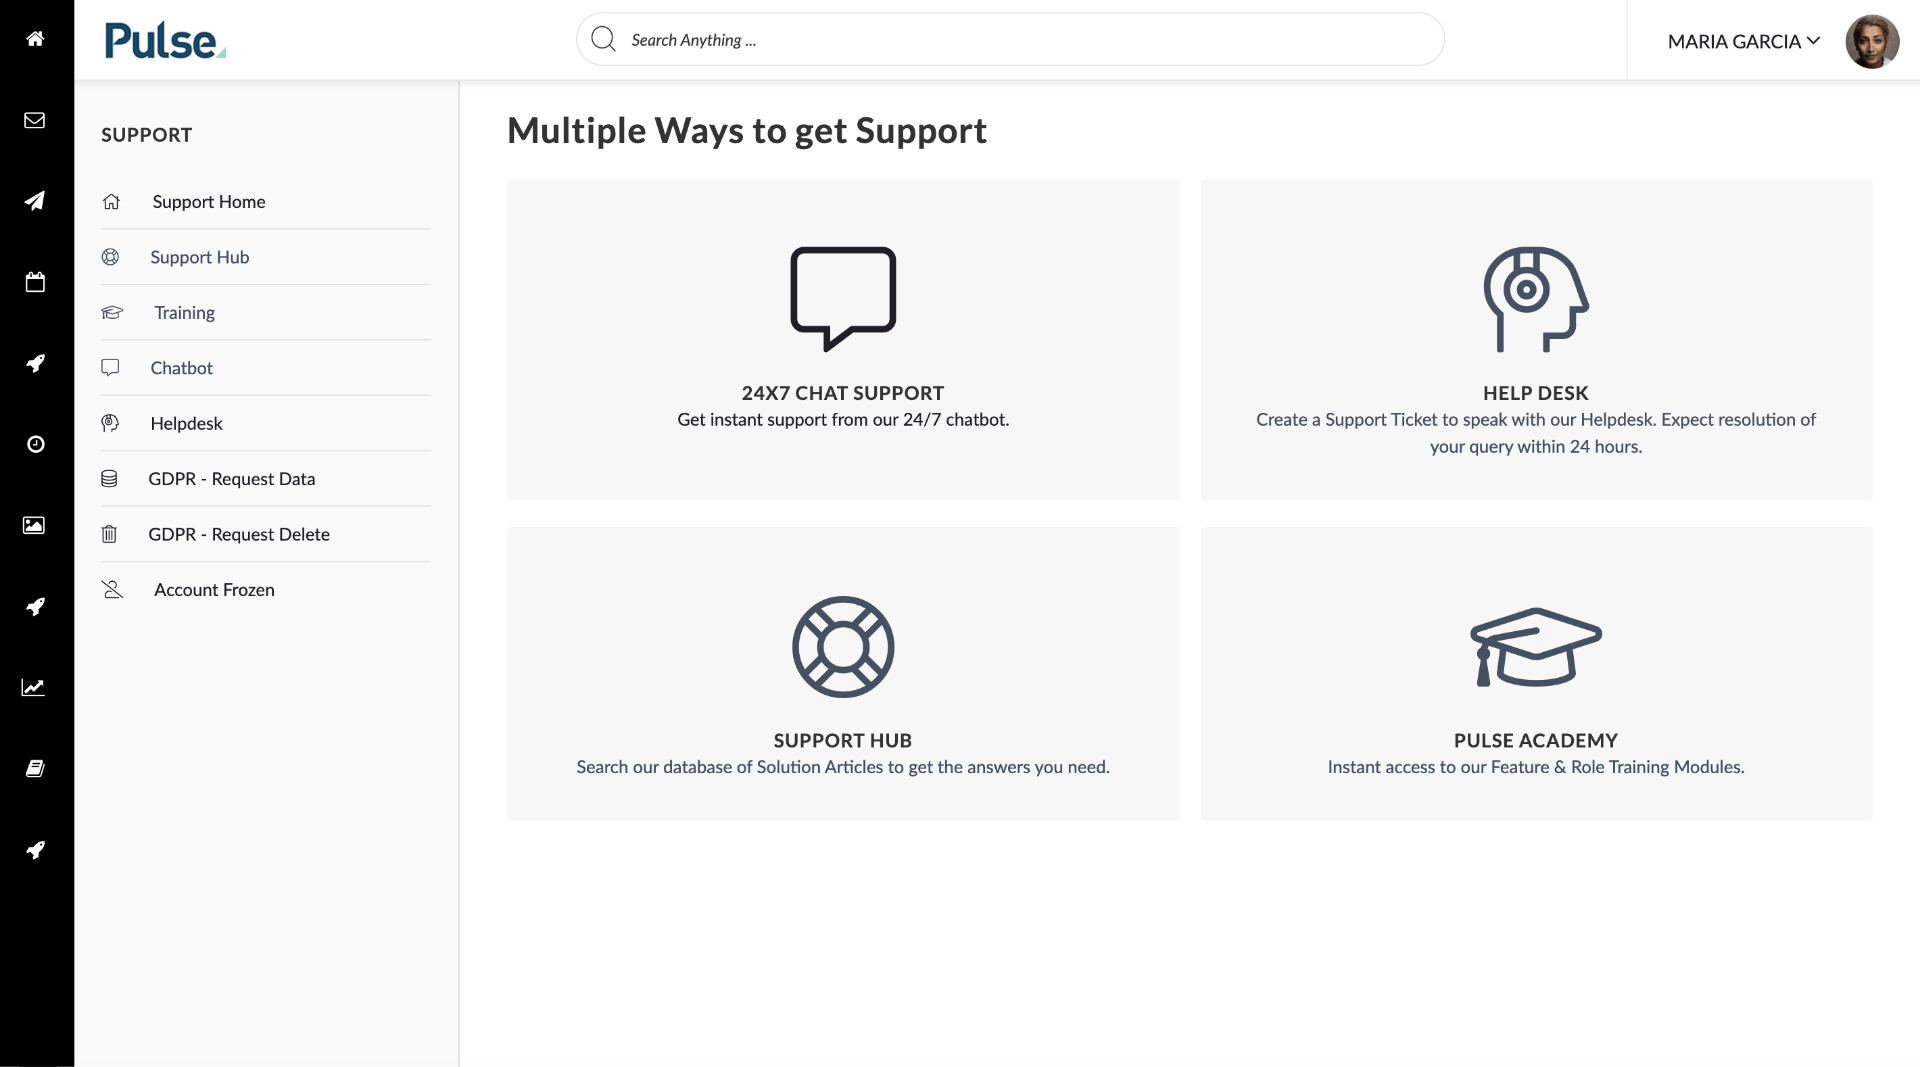
We have redesigned our support section to provide easier access to Helpdesk, Support Hub and our Training pages.
The new Support landing page provides large call-to-action links to the Chatbot, Training and Support pages, and the left sub-nav provide links to GDPR compliance pages.
Enhancements to the Project Wizard Required Fields
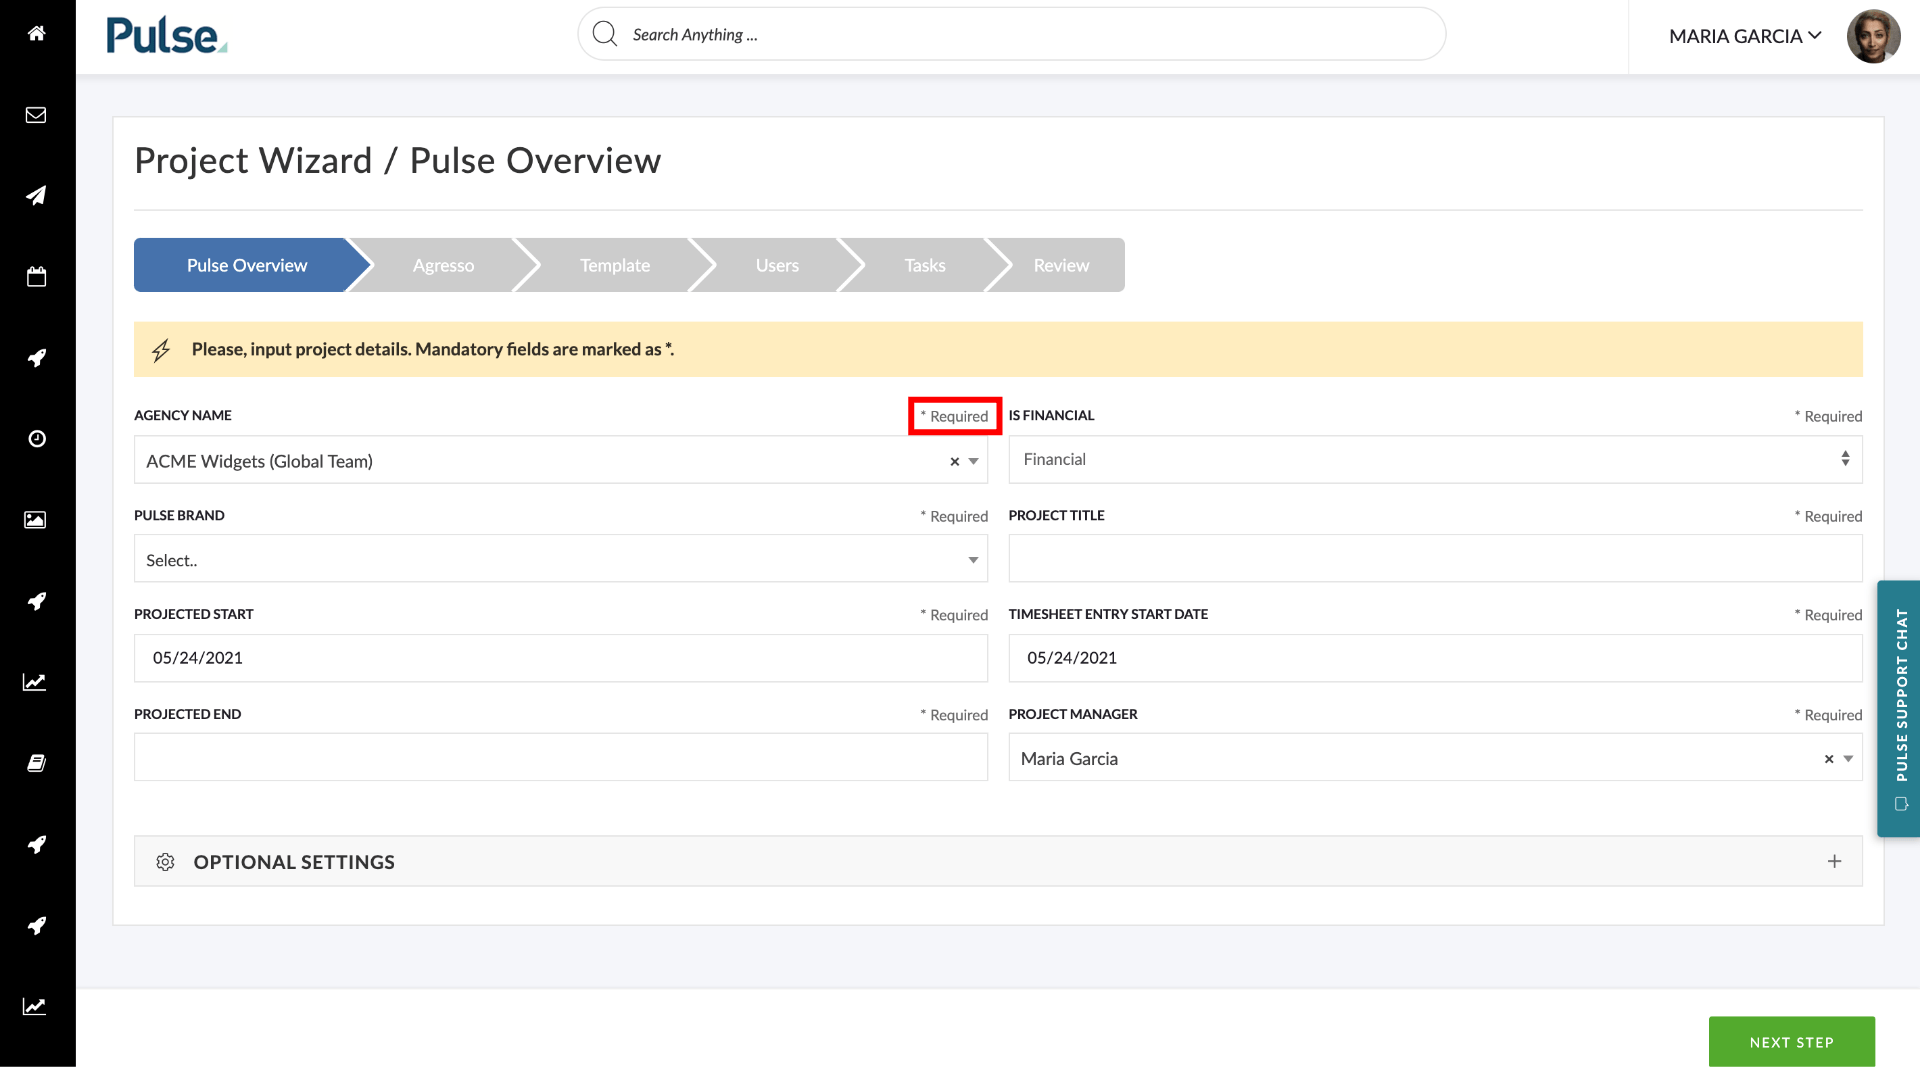
We have made it more obvious which fields in the Project Wizard are “required” before the fields are validated, to make it easier for users to complete each step of the Wizard.
The required fields now have a grey ‘Required’ flag to the top right of the field.
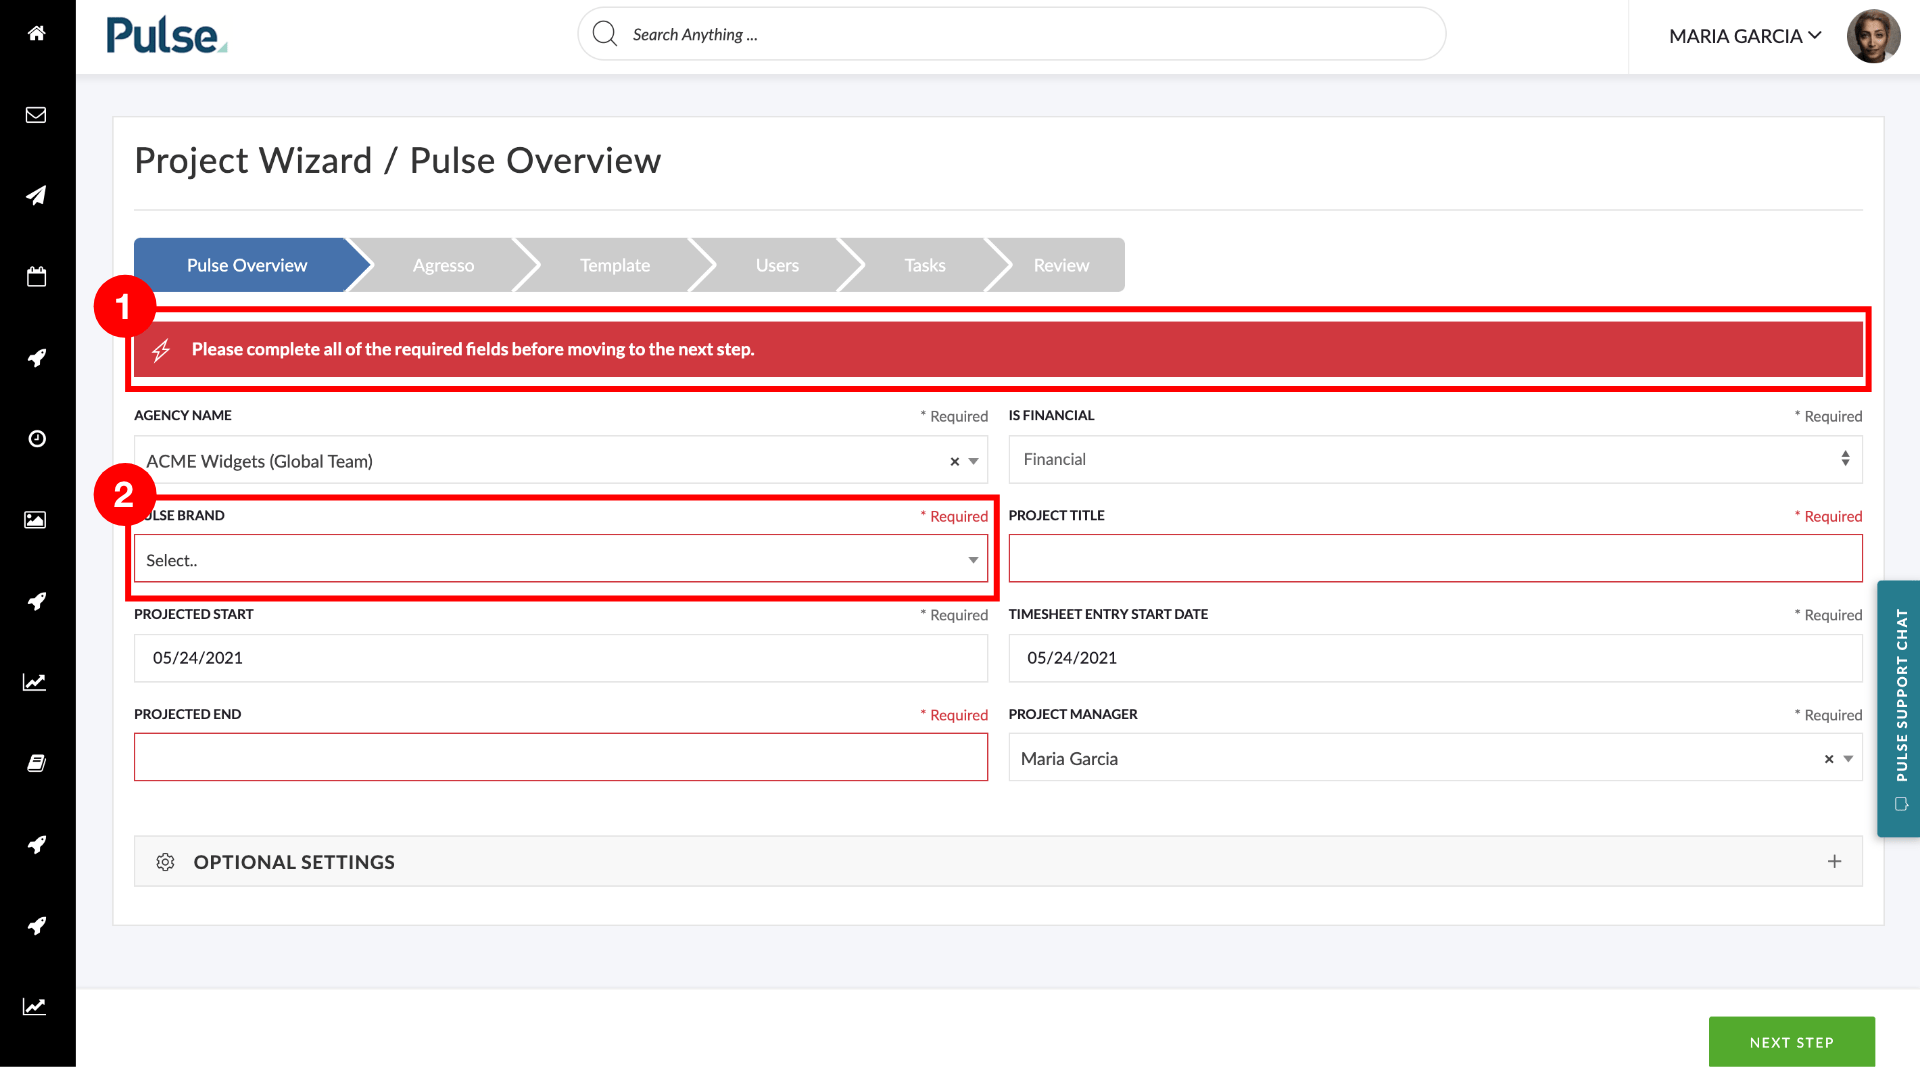
If a user clicks the ‘Next Step’ button and any required fields have not been entered, a message will display in the information bar that states: ‘Please complete all of the required fields before moving to the next step.’
Any required fields that have not been filled in will have a red ‘Required’ label in their top-left and a red outline will appear around the field.
Automatically mark linked PDF documents as ‘void’ when the Finance Document is voided
We have created a new status used for PDF assets that are Finance Documents called ‘Void’.
This is to fix the potential issues that could arise because we did not mark the PDF as ‘void’ when the linked Finance Document is void. For example, this could cause users to accidentally share a void document with a client.
Now if a Finance Document is voided, we update the linked PDF with a status of ‘VOID’ to make it clear that the corresponding finance document is now void.

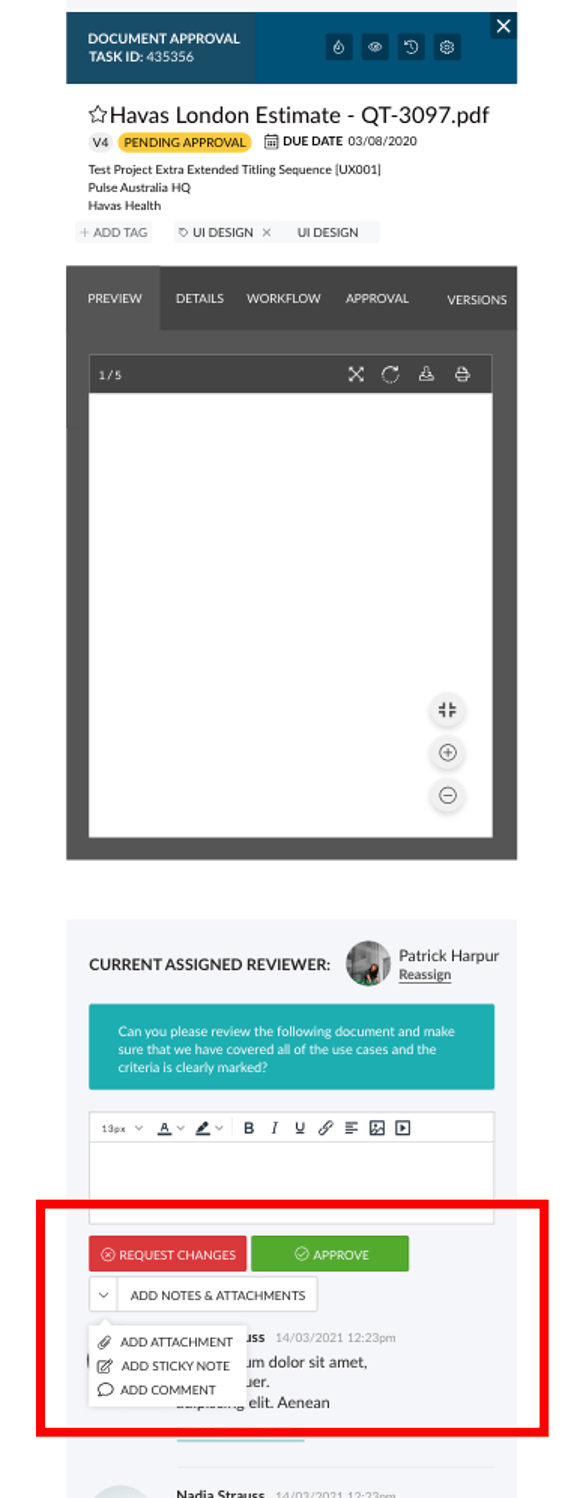
Refinements to Responsive Design of the Document Approval
We have updated the design and layout of the Asset Detail modal to be more effective when viewed on a mobile device.
Adjusted Access Rights for Client users and Vendor users
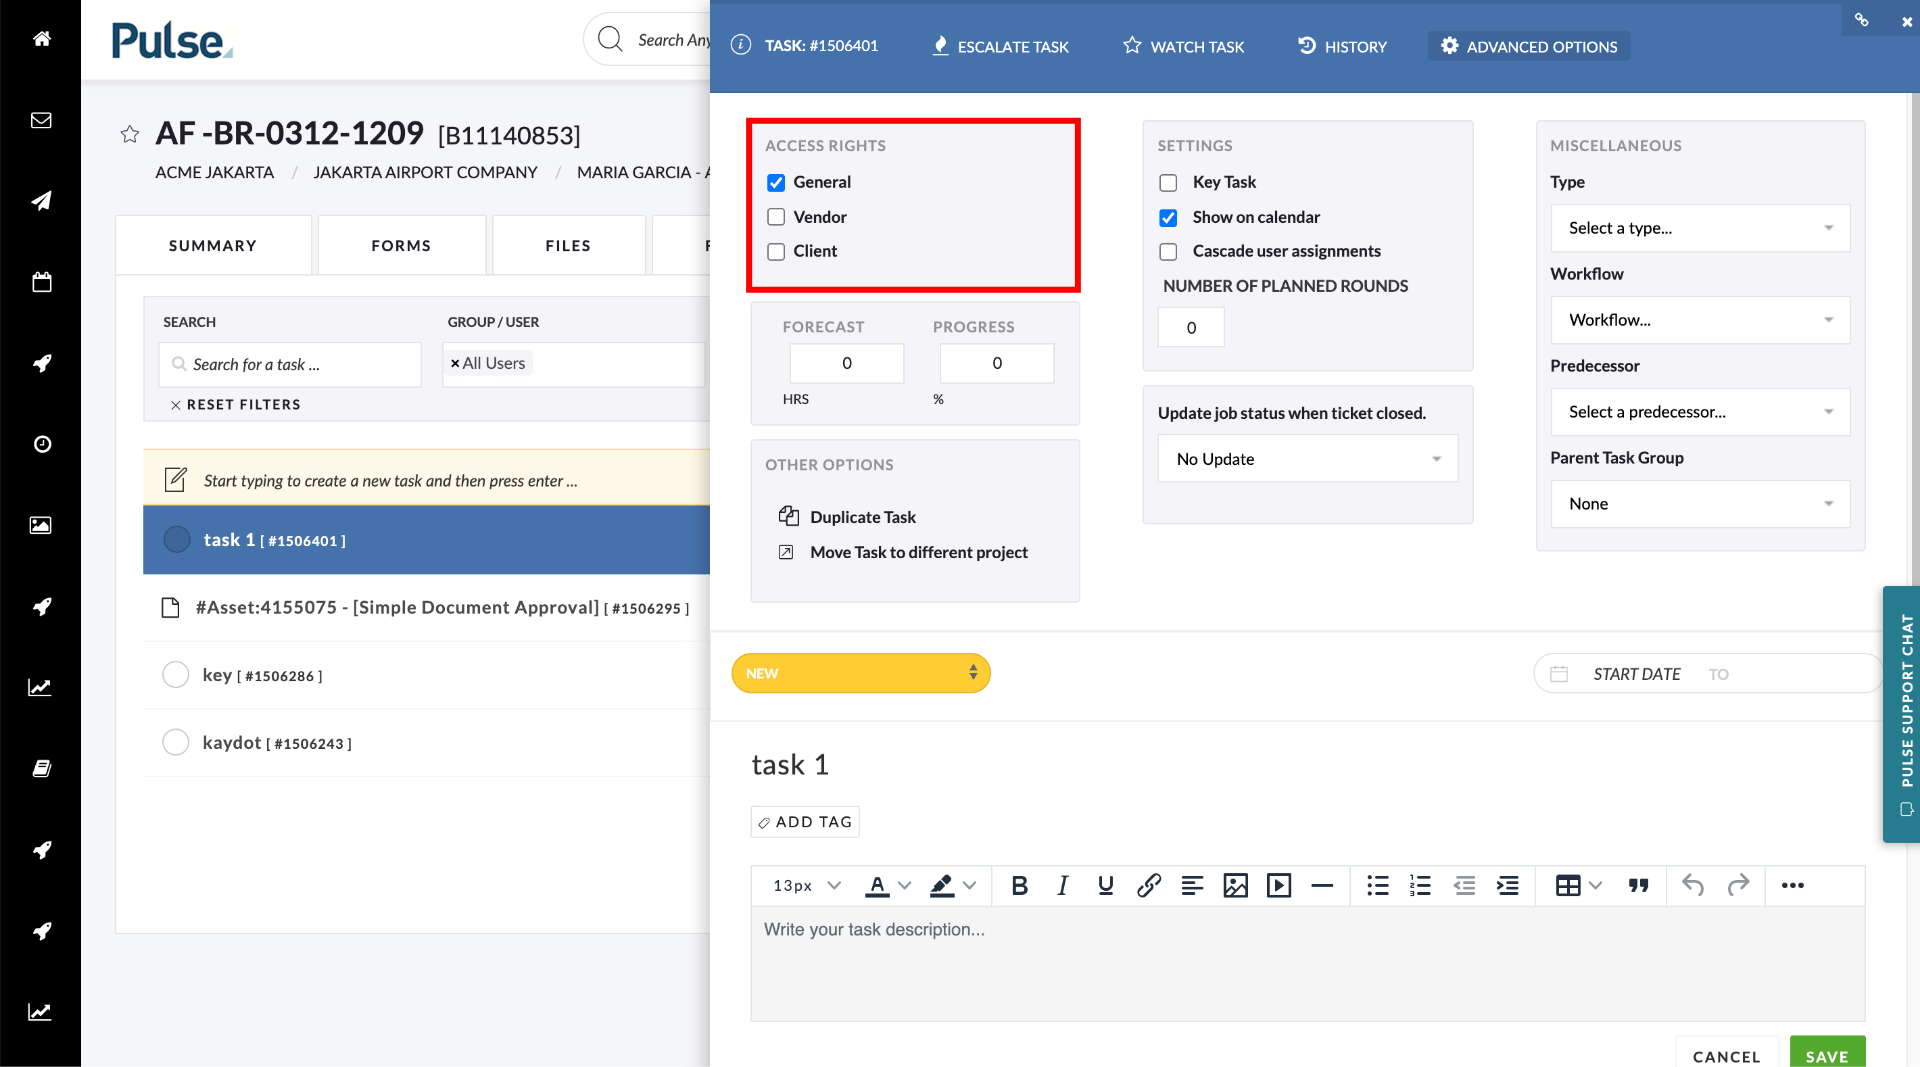
We have adjusted the logic around access to tasks for ‘Client’ and ‘Vendor’ users so that:
- Client users only see tasks when the ‘Client’ checkbox is ticked in the Task Advanced Settings. If the checkbox is not ticked and they are invited to the task, they are not able to see the task.
- Vendor users only see tasks when the ‘Vendor’ checkbox is ticked in the Task Advanced Settings. If the checkbox is not ticked and they are invited to the task, they are not able to see the task.
Summary View for Planner Rollup Report
We have add the ability to select multiple plans to create a single ‘Roll Up’ summary.
You can do this from the Pulse Planner by selecting more than 1 Plan and clicking ‘View Rollup Report’.

This will generate a summary view of all plans.

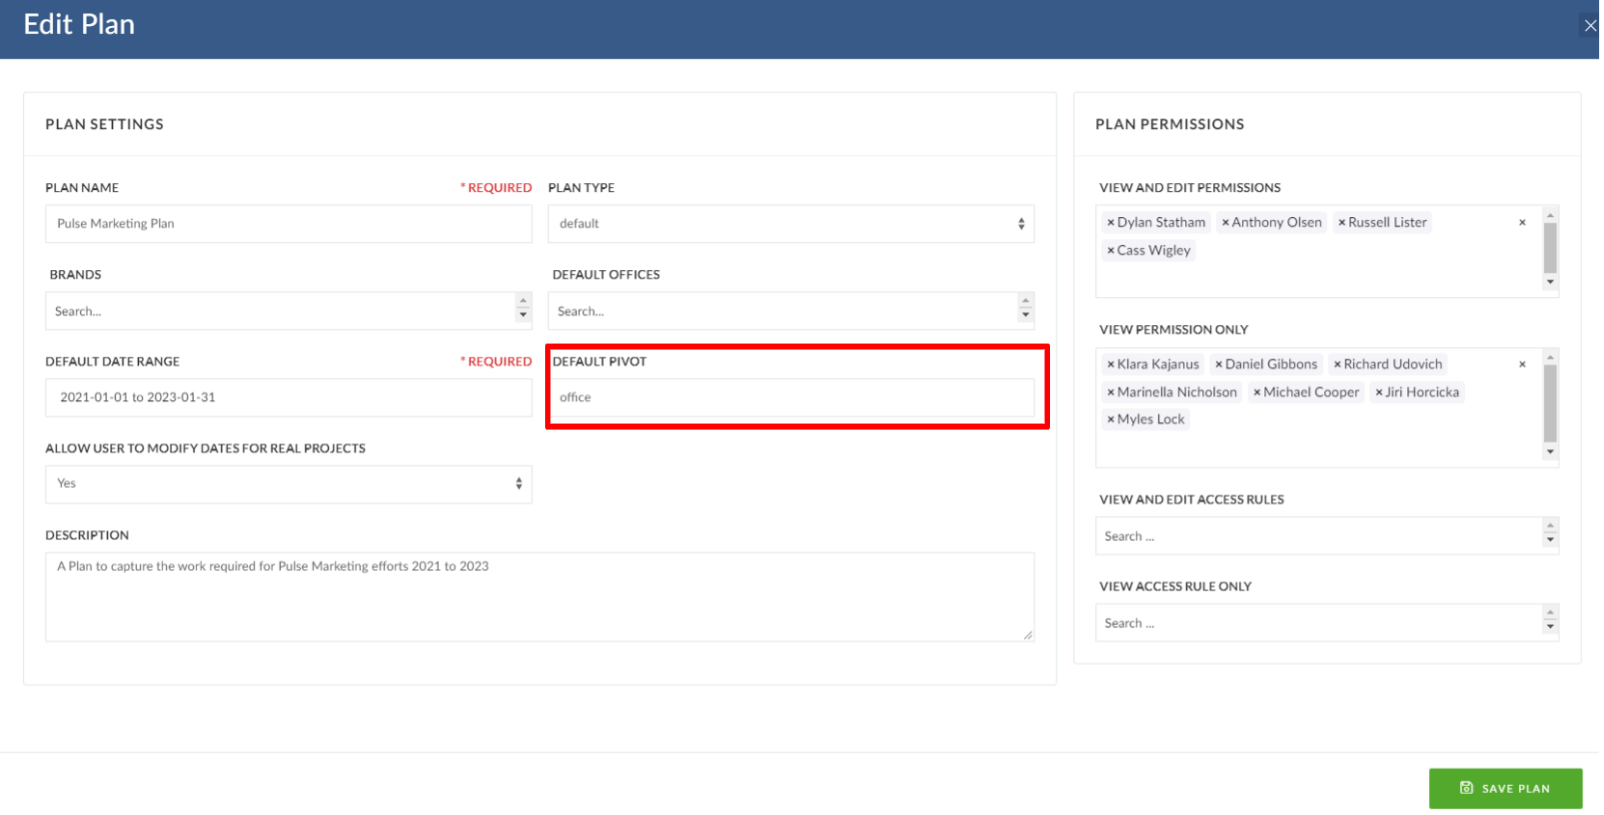
Default Pivot when saving a Plan in the Pulse Planner
We have added the ability to have a default pivot in the Pulse Planner when creating a new Plan.
