The purpose of marking a User as an “Alien User” is to allow a user from outside their Primary Office to add time to Projects within another Office.
When marking a user as an Alien User you can select a Role from the list of Roles determined by your office. By selecting a Role for a user you are:
- Allowing them to bill / add time to the Project
- Assigning them a Rate for financial purposes
1. Got to the ‘Manage Team’ modal
There are two ways to get to the Manage Team: modal.
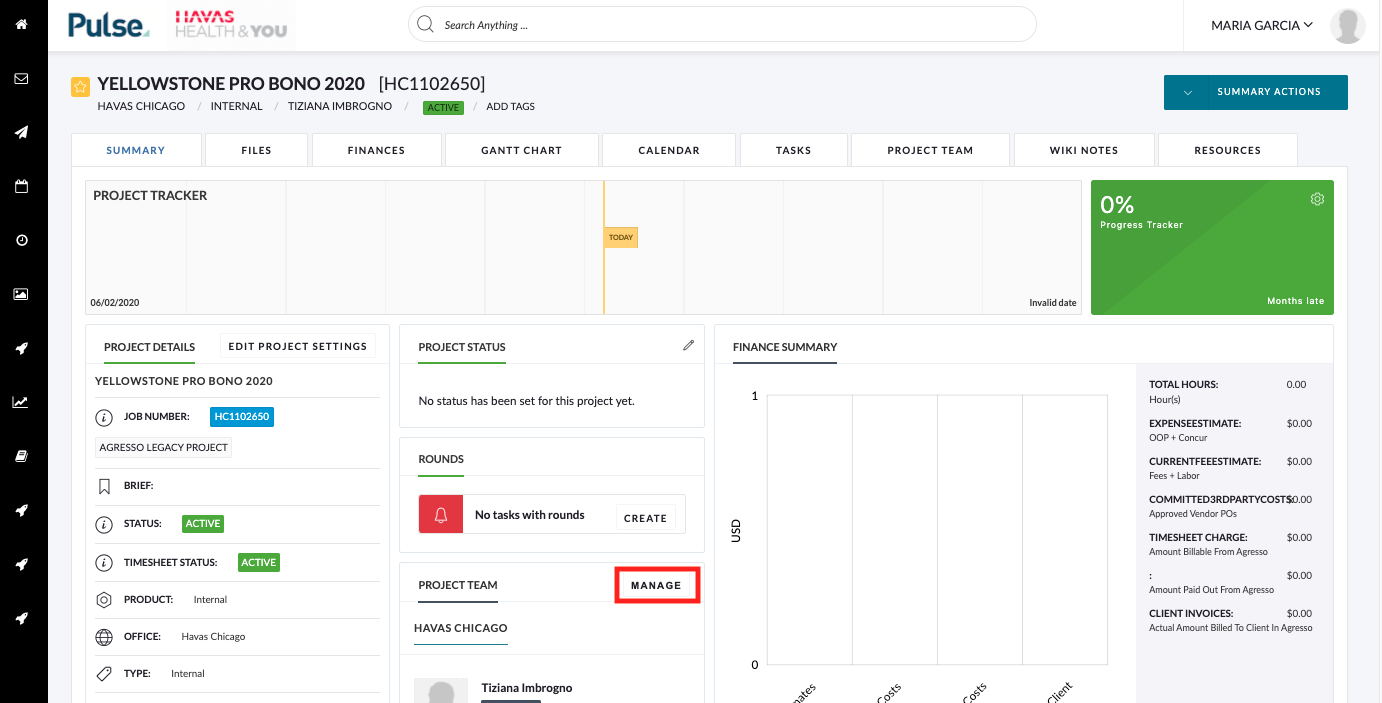
On the ‘Project Team’ widget on the Project Summary page, click the ‘Manage’ button.
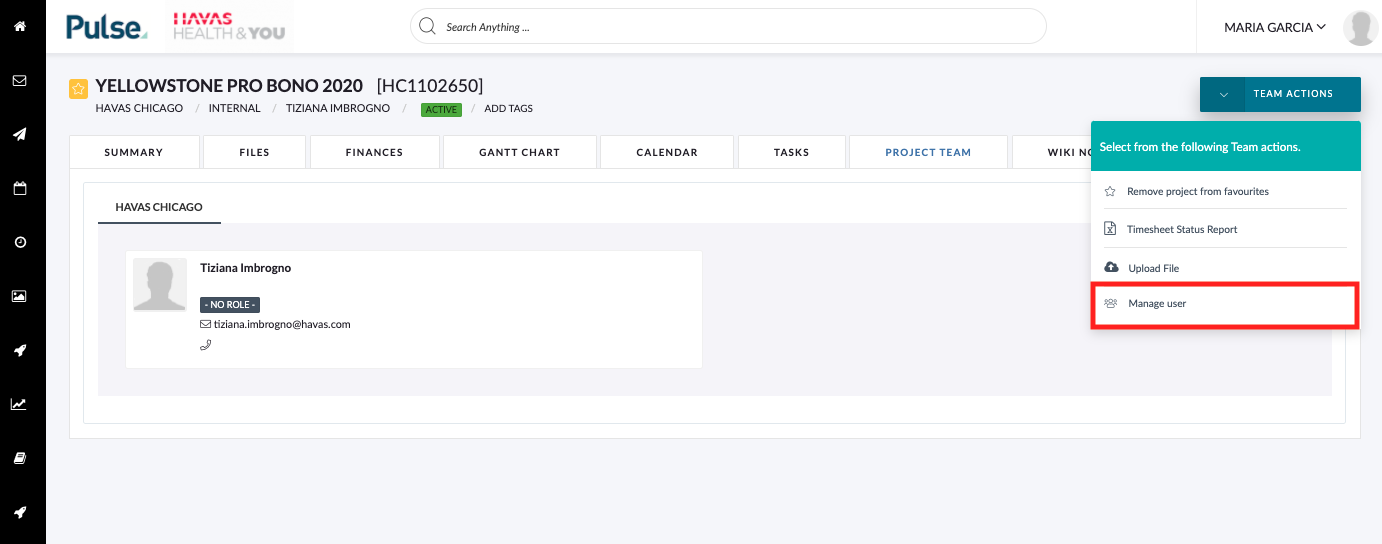
Or, on the ‘Project Team’ tab click the ‘Team Actions‘ dropdown and click ‘Manage user’.
2. Mark an individual User as ‘Alien’
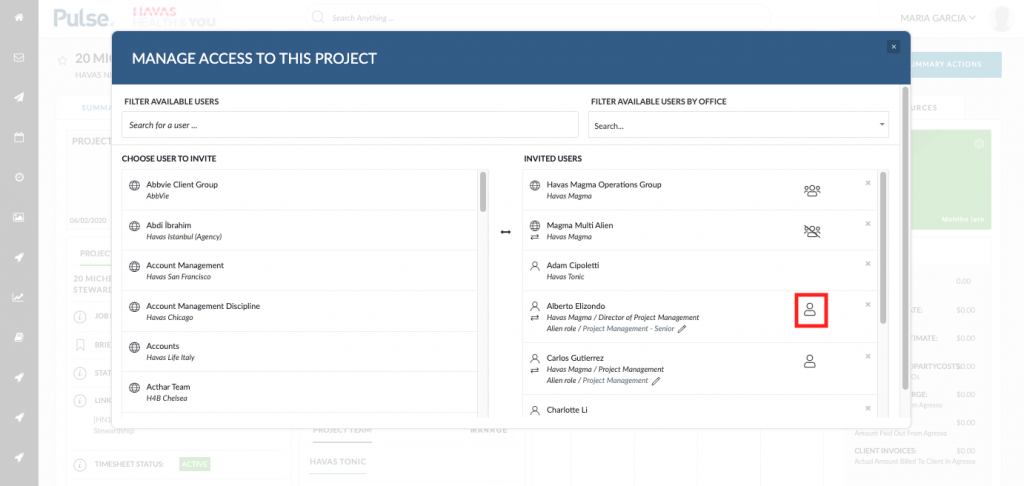
Click the ‘person’ icon against a user to mark the user as an ‘Alien User’.
3. Select a role for an individual User who has no default role
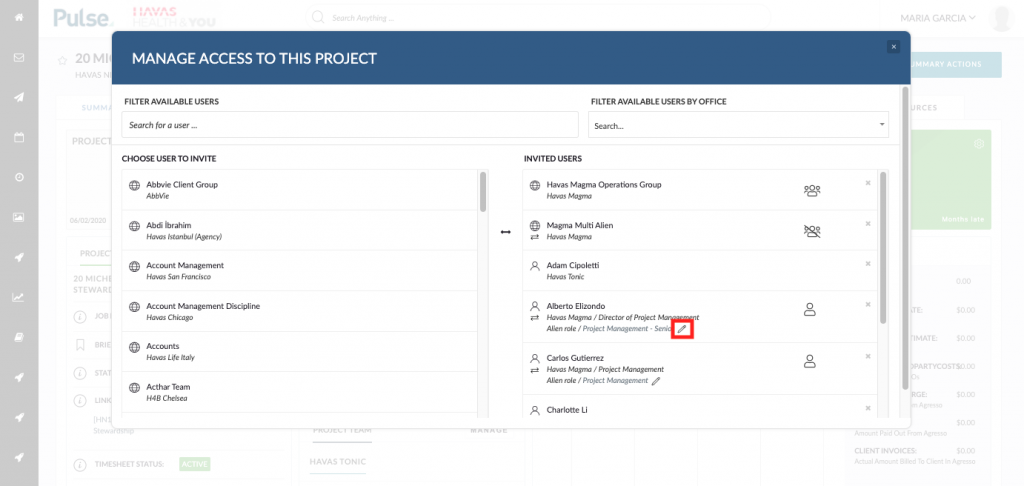
Click the pencil to select a role for users who have no default Role assigned to them.
4. Mark an entire User Group as Alien
Click the “group of people” icon next to an invited user group name to mark that group As alien.
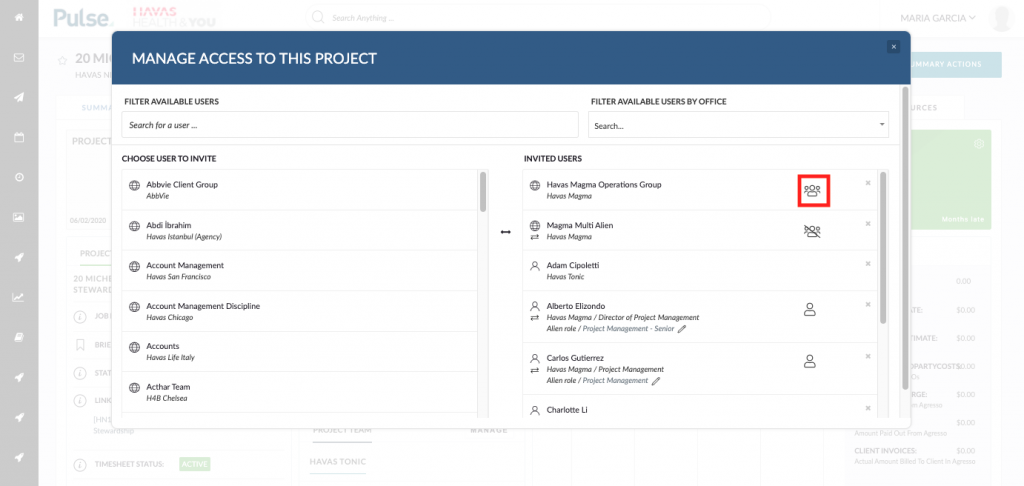
Only users with an assigned Default Role will be marked as Alien when marking a user group or user as alien.
- Please read the article how to set an Alien User default role
For users in that group who do not have a default role aligned you will need to select a role by clicking the pencil icon and selecting a Role from the drop-down.
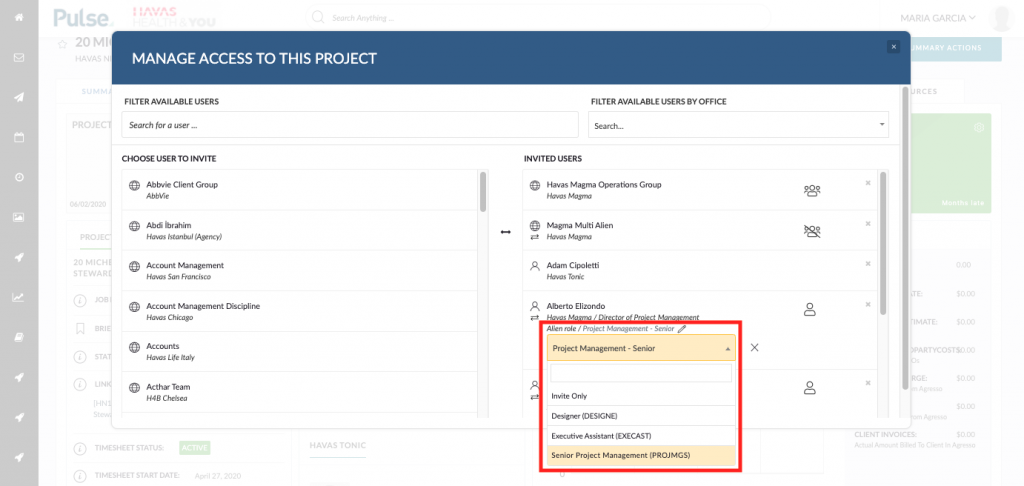
Once a user is marked with a Default Role we create the Phantom Job for approval by the users Finance team.
How to identify Alien Users who do not have a role set
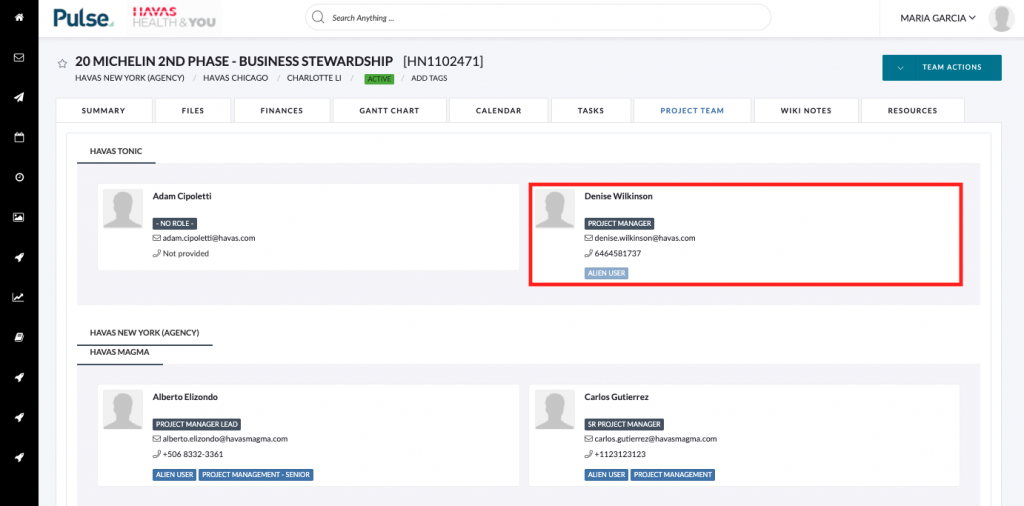
You can identify Users who do not have a Role set from the Project Team tab.
Alien users who have a Role set will have that role next to their “Alien User” badge.
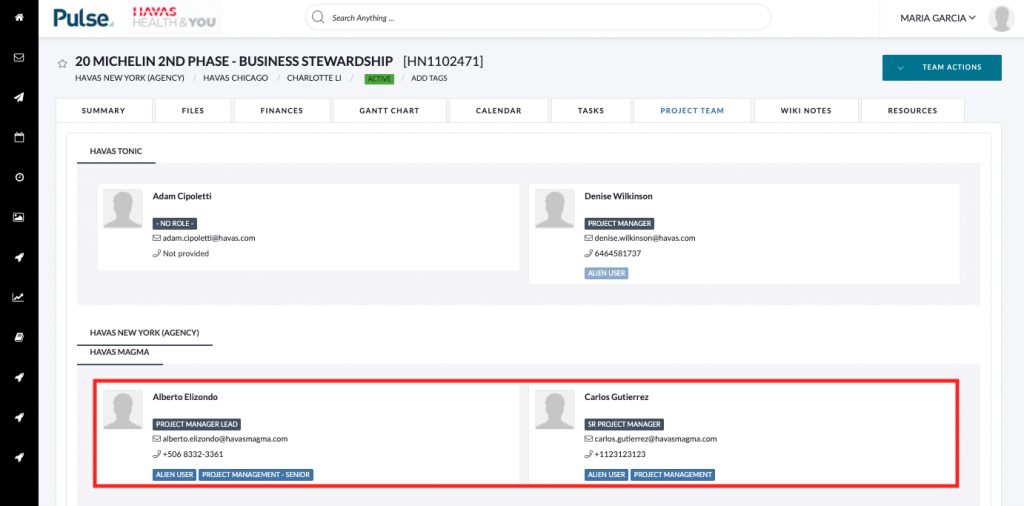

A user without an Alien user Role will have only the Alien User badge in a “disabled” state.

KB.45110
